Installation
How to deploy Mobile Applications
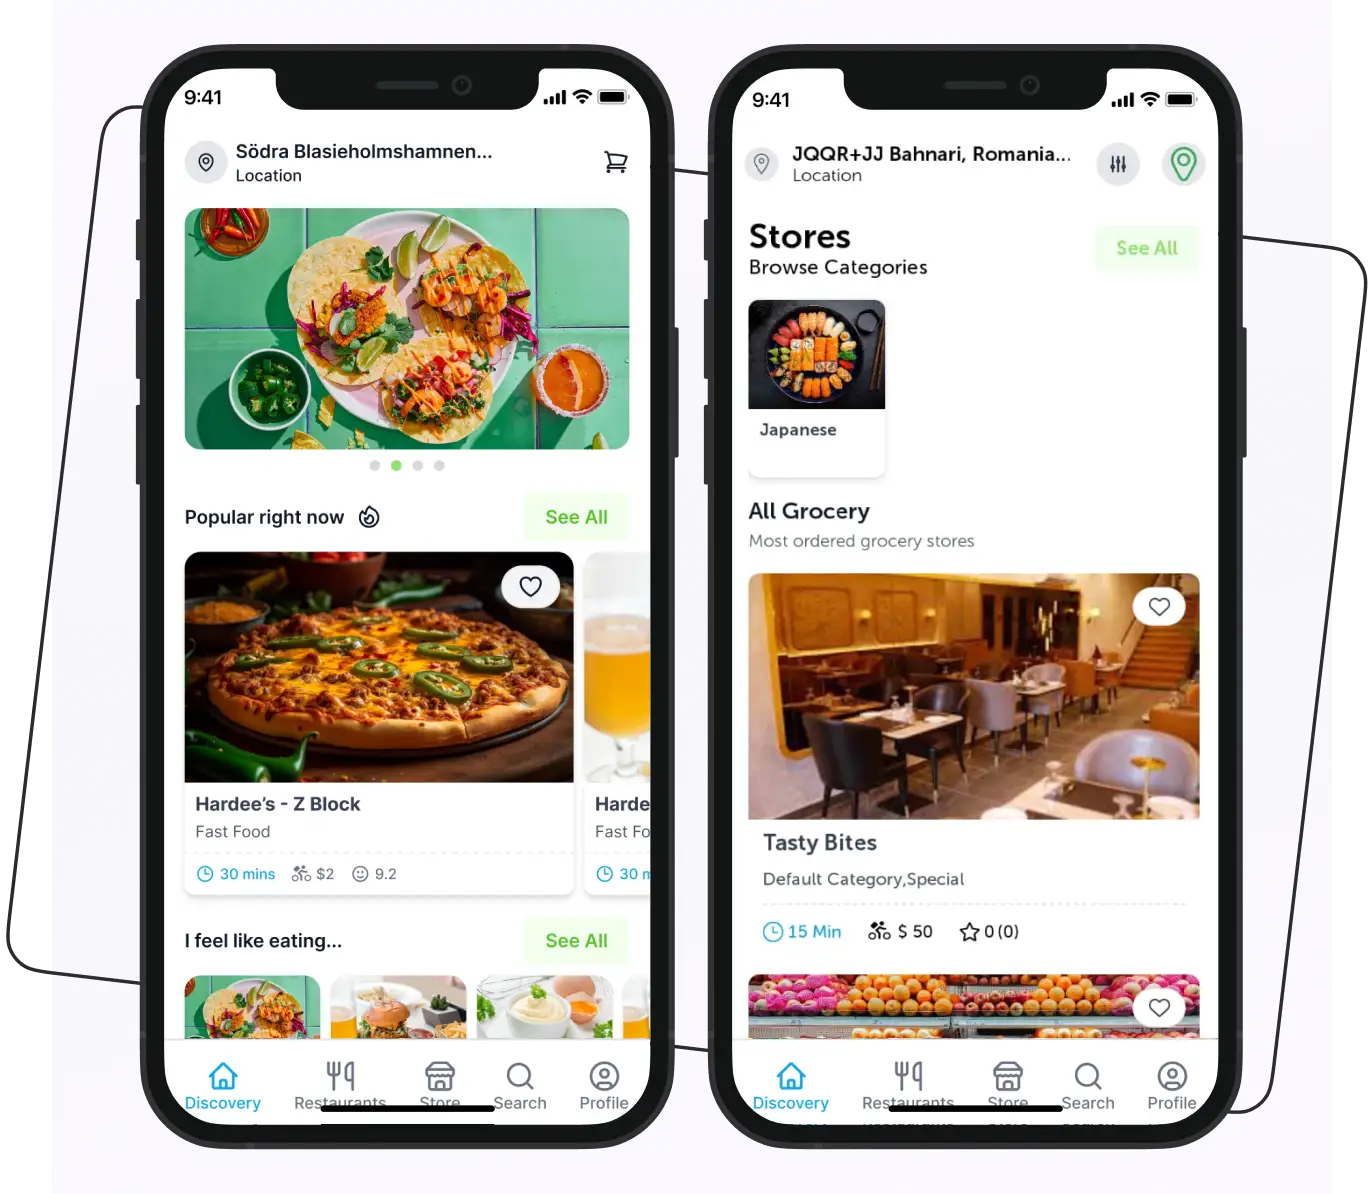
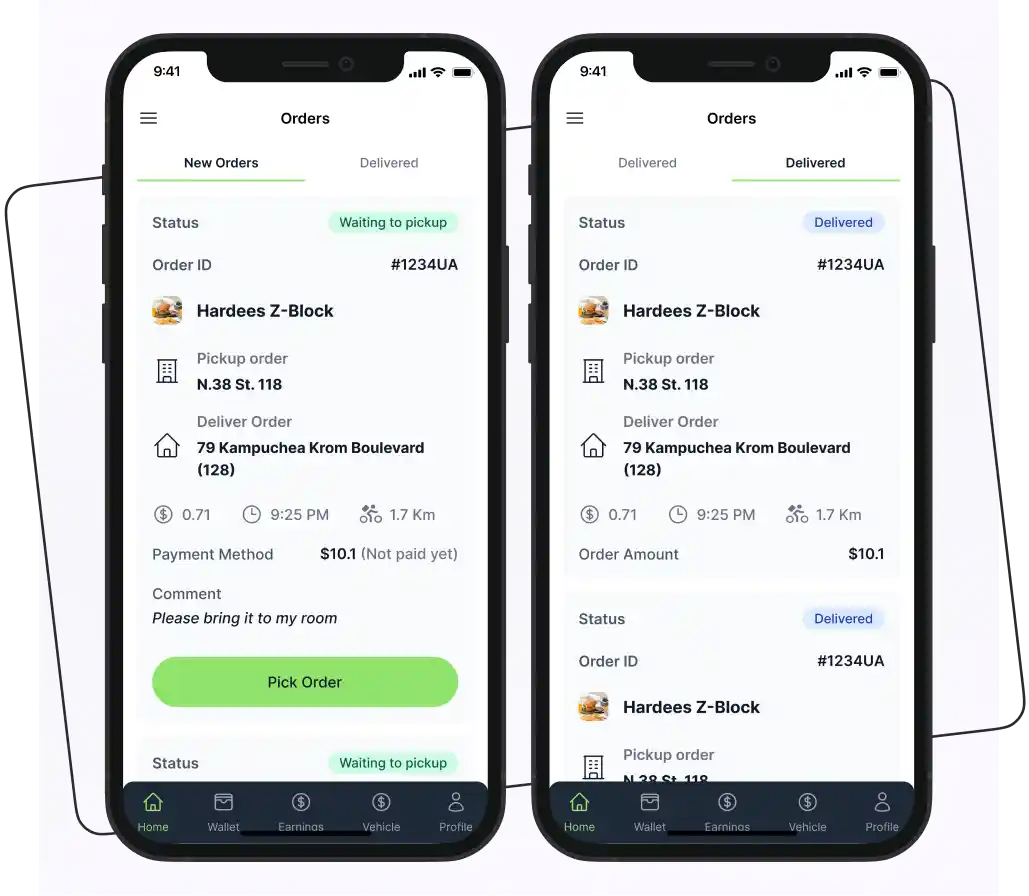
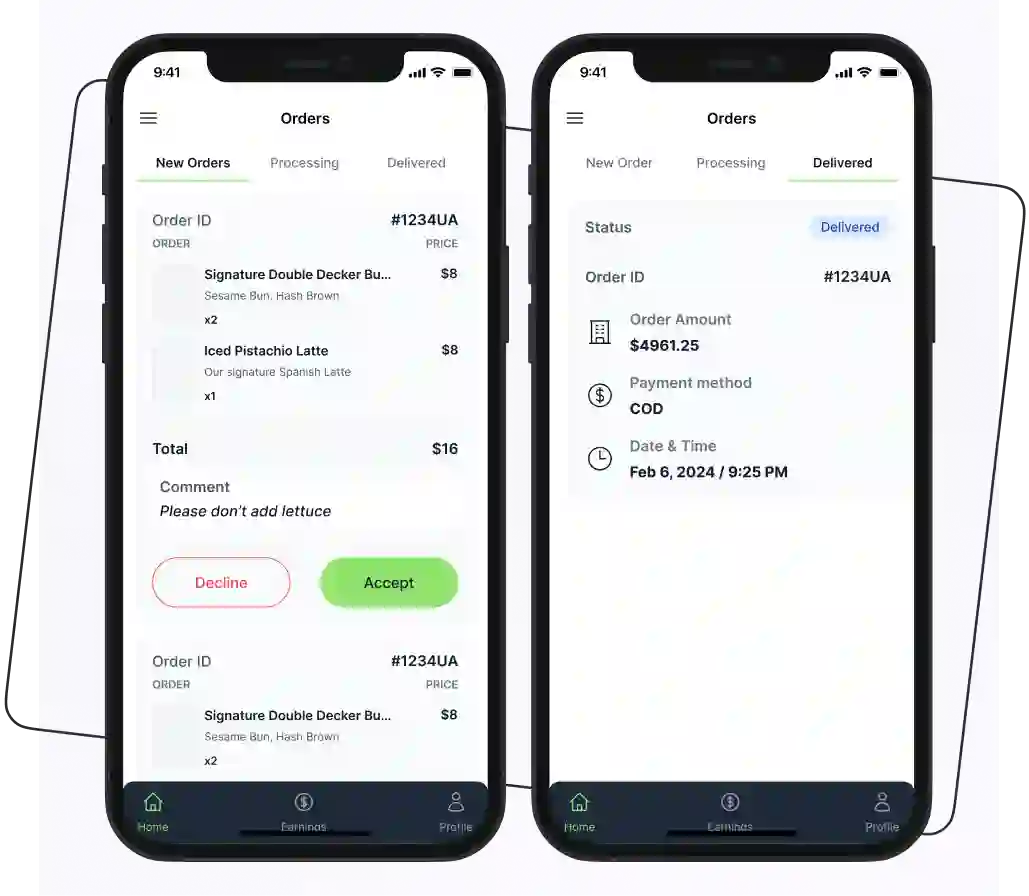
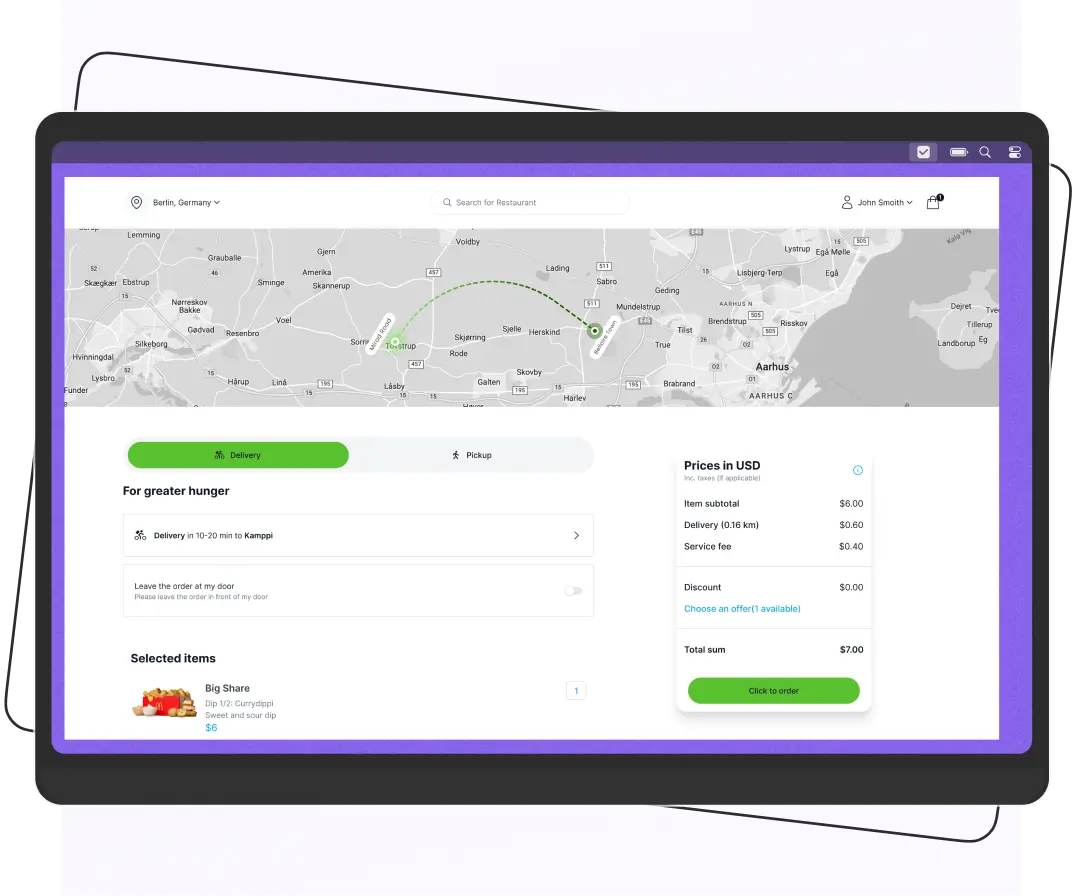
Enatega Multivendor | Mobile Apps Complete Setup
Clone or download the source code from GitHub. To download click on download source code
- cd<Project directory> e.g. cd enatega-multivendor-app
Update environment file (/environment.js files). Following are the credentials you need to change.
Essentially, you are required to update ‘value#1’, ‘value#2’ and ‘value#3’, while the remaining values will be automatically retrieved from the configuration (database) once added through the admin panel. In the case that these values are not obtained from the configuration, kindly hardcode them in the ‘environment.js’ file.


Here are the variables in the environment.js file for the Mobile App, along with a brief explanation of each and their purposes:
- GRAPHQL_URL: This variable contains the URL of the GraphQL endpoint for your API. It is essential for making GraphQL queries and mutations from your mobile app. GraphQL is a query language for APIs that allows clients to request precisely the data they need, and this URL is where your app communicates to retrieve and manipulate data from your GraphQL API.
- WS_GRAPHQL_URL: WS_GRAPHQL_URL specifies the WebSocket URL for the GraphQL API. WebSockets are used for real-time communication, making them suitable for applications that require live updates, such as chat applications, notifications, or dynamic content delivery.
- SERVER_URL: SERVER_URL is the base URL of your server. It serves as the root address for various API requests made by your mobile app. This is where your app communicates to access different endpoints and resources on your server, including the GraphQL and WebSocket services.
What is SERVER_URL?: This variable specifies the base URL of your server. It’s the root URL where your backend API is hosted.
So What is an API? An API (Application Programming Interface) is a set of rules and protocols that allows different software applications to communicate with each other. A backend API is responsible for handling data and requests on the server side of a software application. The Backend code of this project is the API for this project. To make your API accessible to the internet, you need a hosting service. A hosting service provides the infrastructure and resources to run your server, making it available 24/7. Hosting services can be cloud platforms (like Heroku, AWS or Digital Ocean) or specialized services like Railway Cloud.
How to Deploy to Backend API? Deploying means making your API server available and functional on the hosting service. This typically involves uploading your code, configuring the server, and ensuring it’s up and running. Here is how you can Deploy your APi server and get the SERVER_URL for adding in the .env file.
Railway Cloud deployment Video - IOS_CLIENT_ID_GOOGLE: This is a Google OAuth client ID specifically intended for iOS applications. It is used for authenticating users and granting access to Google services within iOS-based applications.
- ANDROID_CLIENT_ID_GOOGLE: This is a Google OAuth client ID designed for Android applications. It serves the same purpose as the iOS client ID but is intended for Android-based applications.
Both client IDs are used for authentication and access to Google services within their respective platforms. They allow applications to securely and efficiently connect with Google services and authenticate users using Google’s OAuth (Open Authorization) framework.
Here’s how you can create IOS and Android Google Client ID
Demonstration of IOS and Android Google Client ID Video - AMPLITUDE_API_KEY: This API key is essential for integrating Amplitude, an analytics and product intelligence service, into a React application.
The API key identifies your app when communicating with Amplitude’s servers. By using this key, you can gather data, analyze user behavior, and make data-informed decisions to optimize your application’s performance and user experience.
Amplitude helps businesses track and analyze user behavior, such as interactions and events within the app. It’s a critical tool for enhancing user satisfaction and app success.
Read more about amplitude here.
Here’s how you can create an Amplitude Api key for this project
Configuring Amplitude Video - GOOGLE_MAPS_KEY: The Google Maps API key is a crucial component for integrating Google Maps and related location and mapping services into the application. This key serves as a unique identifier, granting your application access to Google’s mapping and geolocation features.
Here’s how you can create Google Maps key for this project
Demonstration of google map api setup Video - EXPO_CLIENT_ID: This variable represents a Google OAuth client ID specifically intended for use within the Expo development environment. Expo is a platform for building and deploying mobile applications, and this client ID is used to enable Expo-based applications to authenticate users and gain access to Google services.
Steps to Create an Expo Client ID:- Create a Google Cloud Project:
- Visit the Google Cloud Console (https://console.cloud.google.com/).
- Create a new project if you don’t already have one.
- Enable the Google+ API:
- In your project, navigate to the “APIs & Services” section.
- Click on “Library” and search for “Google+ API.”
- Enable the API for use in your project.
- Create OAuth 2.0 Client ID:
- In the Google Cloud Console, go to “APIs & Services” > “Credentials.”
- Click on “Create Credentials” and select “OAuth client ID.”
- Choose the “Web application” application type.
- Configure the authorized redirect URIs, ensuring you specify the appropriate URIs for your Expo-based application.
- Once created, you’ll be provided with a client ID.
- Set Up in Expo Project:
- In your Expo project, you can set the EXPO_CLIENT_ID variable in your configuration to the client ID obtained in the previous step. This enables Expo to use the client ID for Google OAuth authentication and access to Google services in your app.
- Create a Google Cloud Project:
- SENTRY_DSN: Sentry DSN is used for error tracking and monitoring. It reports and logs errors that occur in your mobile app.
This variable contains the Data Source Name (DSN) that Sentry uses to report errors and exceptions from your application.
Read more about Sentry Here
Here is how you can configure sentry and create SENTRY_DSN_LINK for this project
Configuring Sentry Video - TERMS_AND_CONDITIONS :
- PRIVACY_POLICY: These are URLs(9 and 10) to your app’s terms and conditions and privacy policy pages. They are typically used for legal and compliance purposes.
- TEST_OTP: A test OTP (One-Time Password) that might be used during development and testing for authentication purposes.
- GOOGLE_PACES_API_BASE_URL: This variable contains the base URL for the Google Places API, a service by Google used for location and places-related functions. It’s the starting point for making requests to access location-based data, such as details about businesses, geographic coordinates, and nearby places. Integrating this base URL is essential for applications that rely on Google’s location data and services.
Here is how you can configure Google places Api and create APi_LINK for this project
Configuring Google APIs Video
These variables are essential for configuring and customizing your mobile app, enabling integration with third-party services, and ensuring proper communication with your backend. Make sure to keep them secure and handle sensitive information, like API keys and authentication credentials, with care.
After setting the (.env) file, run the following commands:
- npm install
- Npm start
How to submit your Mobile Apps in the App and Play Store?
Creation of builds
To create the builds for both Android and IOS you need to enter the following commands in your terminal.
- npm install -g eas-cli
Create your Account in EXPO ( https://expo.dev/)
In your terminal type the following Command
- eas login (Login with your expo credentials)
Create new project in expo account as shown below:


When a new project is created in Expo, an ID is assigned to that project


After creating a new project in Expo and pasting its ID into app.json, your project is ready to be built. In your terminal, run the following commands:
- eas build:configure
- eas build –profile production –-platform android
- eas build –profile production –-platform ios
- eas submit –platform ios (to submit your app in App Store)
- eas submit –platform android (to submit your app in Play Store)
For OTA Updates
- npx expo install expo-updates
- eas update:configure
- eas update –branch production –message “Example update”
Enroll in the Apple’s Developer Program
Once everything is finished and your app has been tested, you are ready to publish. You must first have the Apple developer program. If you don’t have then get the Apple developer program from here:

Every app has a special Bundle identification to identify it, and this is also used as the app store URL. The bundle identification can be changed from within the app.json To see the publishing document for Apple in detail click on this link
Enroll in the Google’s Developer Program
Once everything is finished and your app has been tested, you are ready to publish. You must first have a Google developer account.
If you don’t have then get a Google developer account from here
To see the publishing document for Apple in detail see this link
Buy hosting service and domain name
You can get a domain name for any domain name service for example Go Daddy
You will need a hosting service to deploy your API you can use any hosting service for example Digital Ocean
You can host your website admin das


 Android
 Web
Web